
Knowledge Base - Online Installation on "Live" website (Joomla Only)
- Applies To: POS for Virtuemart
When logged in to the administrator section, go to extensions->extension management
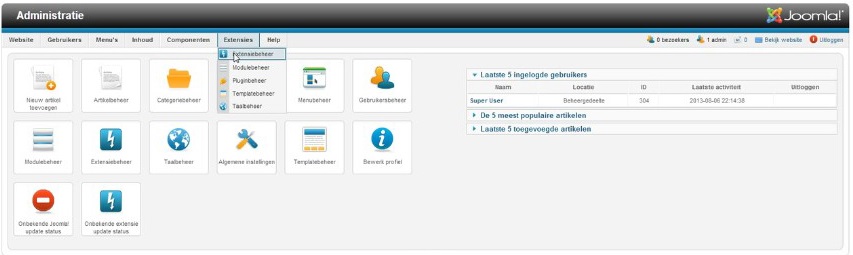
Click on “upload a package” and go to the folder where the POSforWebshops component is downloaded and click on “upload & install”
If you didn’t install the sample data you will need to create a new main menu. Go to menus->menu manager->add a new menu
Fill in the title and menu type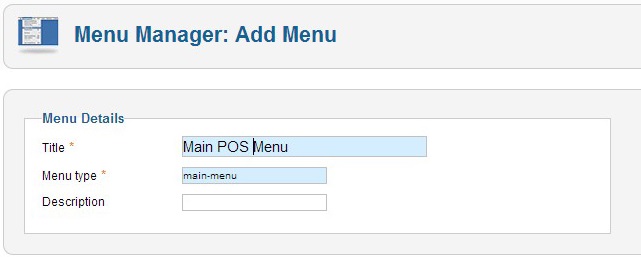
Click on the Main POS Menu in the menu manager and go to the `tab` Menu items.
Click on the “+” to add a new menu item.
For the Menu Item Type choose “POS->Main POS Screen”
Fill in the Menu title and copy the link from the "Detail" Tab.
Click on Save & Exit Next open a new tab in your browser in fill in your site name and paste the link behind the url. Something like
http://YOUR-WEBSITE-NAME/index.php?option=com_pos&view=pos&format=raw
You will see see this screen:
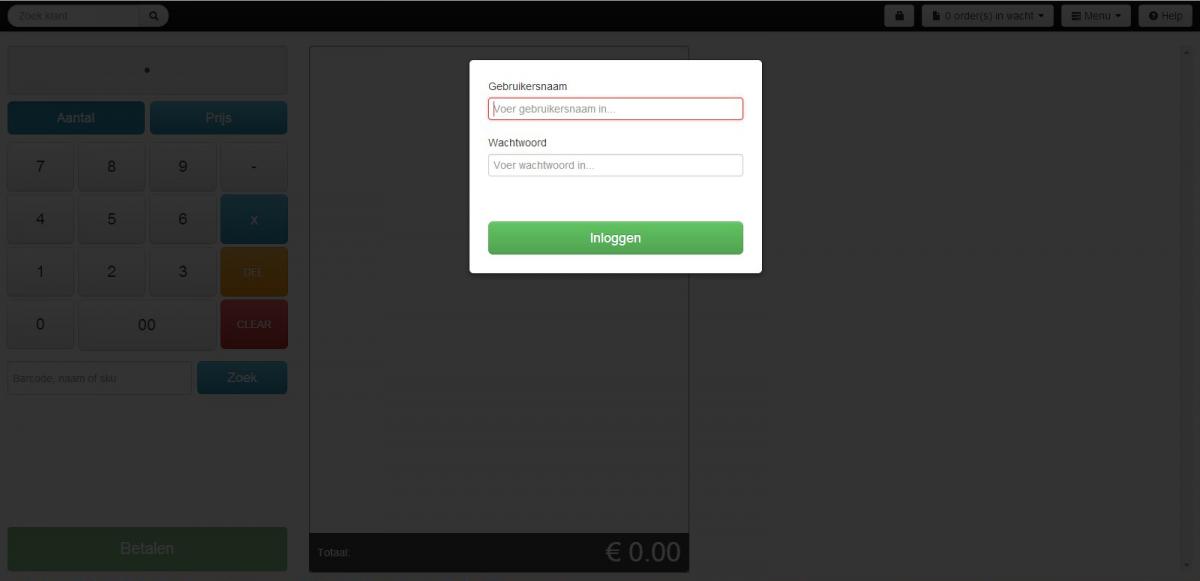
Fill in your username and password:
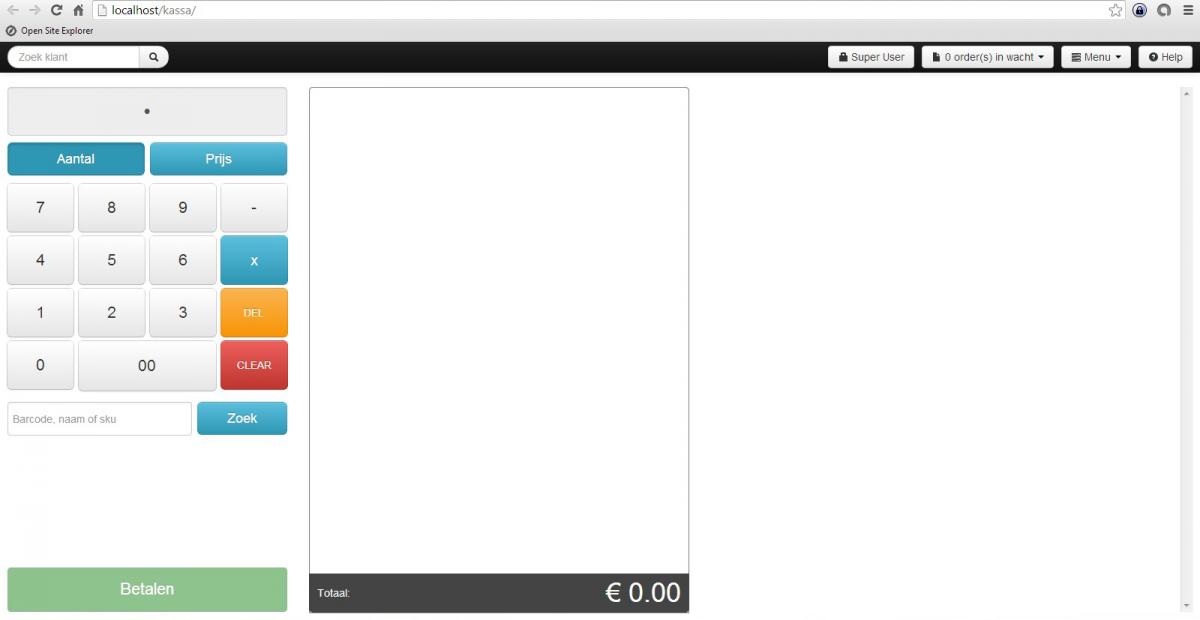
Now POS for Webshops is ready to connect with your webshop.
Login Form
Stop the hassle of running a online and offline business
If you have a webshop and a brick-and-mortar store, how do you keep track of your stock? Do you still need to add new products by hand in your cash register? We know how frustrating and difficult it can be to manage both your webshop and physical store. POS for Webshops is built to improve your business online and offline.